Summary:
In the How to Use Custom Delay Timer video, 2014 Infusionsoft Partner of the Year, Kim Snider, provides the audience with a succinct and clear demonstration of how Custom Delay Timer can be used to delay a campaign from firing using seconds as the unit to determine the length of delay.
How to Use Custom Delay Timer:
Time Stamped Show Notes:
- 00:07 – Video jumps right into the Campaign Builder demo
- 00:16 – Infusionsoft users would use Custom Delay Timer if, for example, they wanted to build a delay into a sequence but required something shorter than what Campaign Builder naturally has built-in (which is a 15 minute delay)
- 00:57 – Custom Delay Timer is an HTTP Post plug-in and it gets installed on YOUR server
- 01:39 – There are two parameters to Custom Delay
- 01:40 – How many seconds does the delay need to be (delayFor)?
- 01:45 – A unique call name (callName)
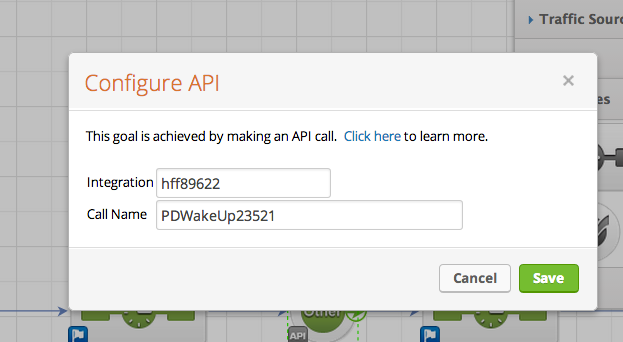
- 02:00 – Following every delay there needs to be an API Goal
- 02:17 – Looking at the Goal you can see the App Name (which is also in the URL) and the callName
- 03:15 – Think of an API Goal as having a the same function as a tag; the only difference is that with a tag goal you must access the contact record to apply the tag
- 03:38 – Kim demonstrates how this works in practice
- 05:32 – The API Goal is particularly useful if you make a number of calls to external 3rd party integration
- 06:07 – Checking to see if Custom Delay Timer worked properly


