Summary:
We Integrate Systems
At this stage of the game, it should come as no surprise to anyone that Google does way more than enable web-enthusiasts to quickly and efficiently search the internet.
Gmail, Google Calendar, Google Translate, Google Drive…the list can go on and on and on.
Google developers have created so many algorithms, apps, programs and digital gizmos that there are probably more than a few you haven’t heard of or, at the very least, aren’t familiar with.
Fortunately for you, Business Insider – Australia decided to catalogue five of their favorite Google features that most people – us included – don’t know about.
This one is as cool as it is convenient. Whether you’re looking to perfectly hard-boil an egg or just measure how long it takes to read your emails in the morning, a timer is going to be immensely helpful. Simply go to www.google.com, enter whatever time you need in the search bar followed by the word “timer” (example: “one minute, timer”) and you’re good to go.
An amazing alliance has been formed and it’s too fun to ignore. Google partnered with LEGO to build a web-based application enabling users to get creative in ways previously unimaginable. By visiting Build With Chrome, people can use digital LEGOS to construct anything their heart desires from existing cities and structures to top-hat wearing dinosaurs.
Ever see a number with so many zeros your head starts to spin? We have. Number Speaker is another feature available within the Google search bar that helps the less mathematically inclined verbally digest the value of a given figure. Just type a number into the search bar (example: “1,000,000”) and follow said number with an equals sign (=) as well as the word English (1,000,000=English).
At one stage or another, we all looked to the stars with childlike wonder and now Google is looking with us. In its simplest form, Google Sky is basically Google Maps for space, enabling users to explore the intricacies of our solar system and beyond without straining their eyes or reaching for a telescope. Though we’re not sure how they did it, we’re glad they did!
Tired of choosing between Comic Sans, Times New Roman and Helvetica for your webpage? Google has taken the liberty of broadening the tired horizons of type font for those in desperate need of something fresh. Sort through the existing font families by name, date-added, popularity, etc. or start building your own custom font in any script (Latin, Arabic, Cyrillic, etc.) you want.
As helpful as we hope these five tools might be, are there some lesser known Google apps, tips or tricks that you love but we failed to mention?
LET US KNOW.
Growing The API Guys’ knowledge base is impossible without the vital and much-loved input of those around us.
Remember, we’re all in same tribe at the end of the day! 🙂
If you would like to see the process we are about to describe, try it out on the companion site to this post.
1) Purchase and install the Gravity Forms Developer License and activate the Signature Add-On.
DISCLAIMER: The purchase link for Gravity Forms is an affiliate link. If you click it and then buy, we earn enough to put some Diet Dr. Pepper in the fridge.
2) Download and install the URL-Params plugin from the WordPress plugin repository. All you have to do with this one is install it and activate it.
3) Next, we are going to add a snippet of code, called the gform_email_fields_notification_admin hook to your functions.php file in your WordPress theme directory.
Using FTP, navigate to your theme folder. It will be located in a sub folder of your web site directory, (often called www or public_html.) The path will be /wp-contents/themes/YOUR_THEME or YOUR_THEME-child. This is what it looks like on my server:

Copy the following code:
add_filter('gform_email_fields_notification_admin', 'add_field_to_email_list', 10, 2);
function add_field_to_email_list($field_list, $form){

// Adds field with ID=1 to the list of email fields
foreach ($form['fields'] as $field) {

// This ID must match your email field on contract form
if($field['id'] == '1')
$field_list[] = $field;
}

return $field_list;
}
Scroll to the bottom of your functions.php file and paste the code there. Be sure to Save. This is what it looks like in my file, in case WordPress goobers up the code above, which it sometimes does 🙁
NOTE: If you create a form, in the next step, that has an email field ID not equal to 1, you will need to come back to this file and update the line that says “if($field[‘id’] == ‘1’)” by changing the number to the ID of your email field.
1) Create a new Gravity Form. You will use this form for your new contract template.
2) The first thing you want to do, once you have the new form created, is go over the the right hand side of the Form Editor and click one time on the Hidden button.
Rinse and repeat for each piece of dynamic data you will be sending from Infusionsoft to Gravity Forms to be included in the contract. In this case, we will use first name, last name, email address, hourly rate and today’s date.
NOTE: For the parameter name of the dynamic field, you can use any name you want. However, it is best to keep it short because it will be passed in an email query string. Also, write down the parameter name you used because you will need it later.
3) Add an HTML field for your contract text.
It may be helpful to use multiple HTML fields, for complex contract designs, to give you more control over the PDF template later.
In the HTML, you will substitute short codes for the dynamic data, like so:

Note that the parameters, in the shortcodes, MUST be the same as the parameters you used in the hidden fields and the query string in the Infusionsoft email we will construct in Step 5.
Finally, go to Advanced Fields and add a signature block.
4) Set up your Notifications – these will automatically include the signed PDF

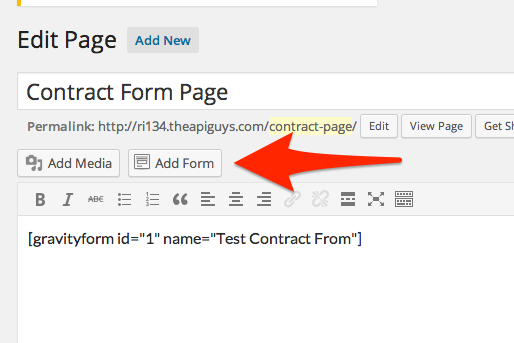
5) Add your form to a page or post
1) Download and install the Gravity Forms PDF Extended plugin from the WordPress plugin repository.
NOTE: Once installed and activated, you must initialize the plugin by going to Forms -> Settings -> PDF.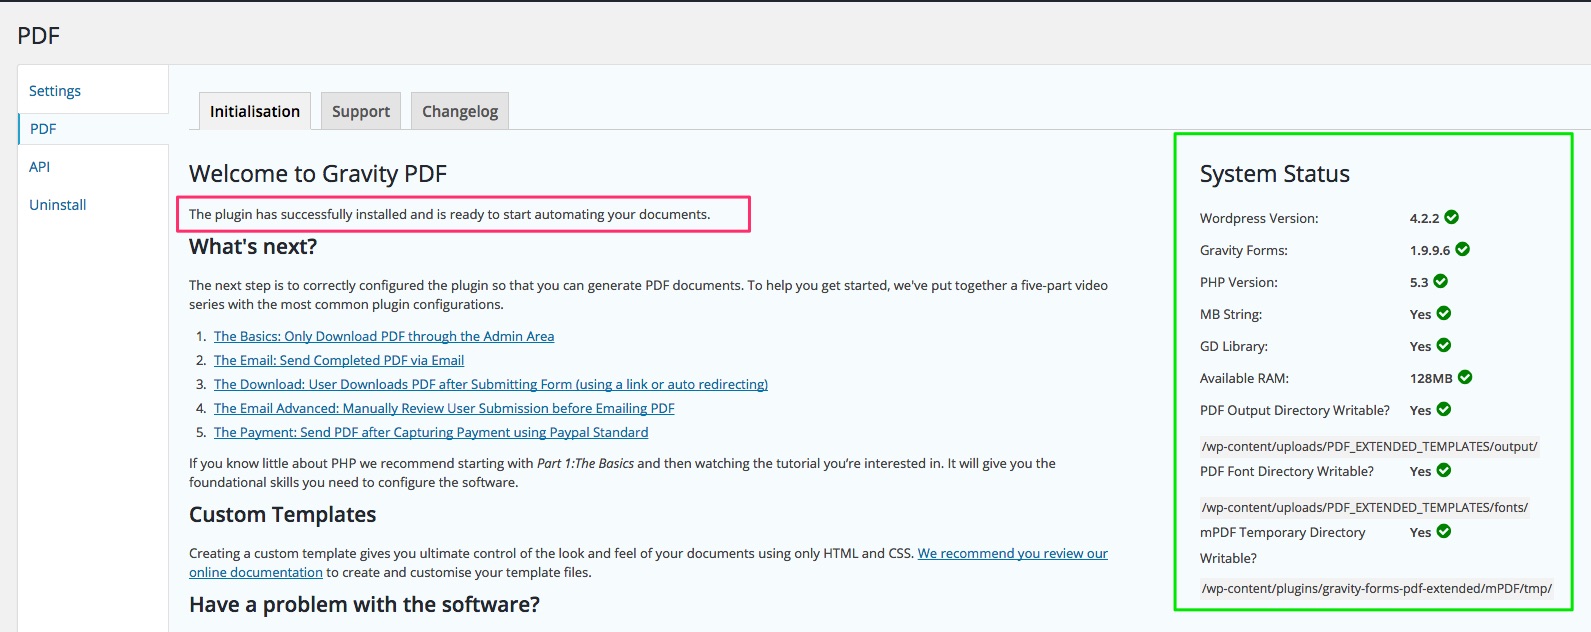
Once you open this settings page, the plug-in automatically initializes. You can se it also shows you, on the right side, that all of the requirements for running the plug-in are met. If the plug-in does not initialize, check these settings to help troubleshoot.
ANOTHER NOTE: We really, really recommend you read the documentation for this plugin. However, for those who never read the manual – and you know who you are – here’s the basic instructions for how to set it up …
2) Modify configuration.php
Using your text editor, open the configuration.php file in the plug-in directory of your active theme. The path will be YOUR_WEBSITE_DIRECTORY/wp-contents/uploads/PDF_EXTENDED_TEMPLATES/configuration.php.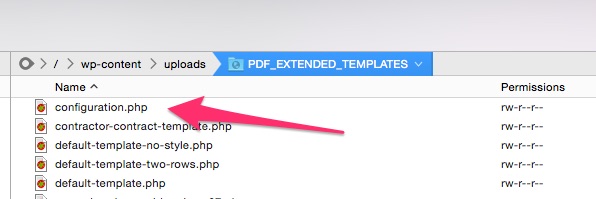
Scroll down to the the section called Bare Minimum Configuration Code. For each form you intend to use for signed PDFs, you will need to include the following code in this section …
$gf_pdf_config[] = array(
'form_id' => 1, // This is the id of the Gravity Form you want to use
'template' => 'default-template-no-style.php',
'save' => true,
'notifications' => array('Admin Notification', 'User Notification')
);
Be sure to SAVE.
3) Fill out your contract form to create a form entry
You can do this either in the Preview mode of the Form Editor or by viewing the page where you added the form. In the WordPress Admin, go to Forms -> Entries. Hover over the entry you just created. You should now see a link to “View PDF”. Click that to open the unstyled PDF.To see all of the fields available and their field ID numbers, add “&data=1” to the end of the URL and hit ENTER. (NOTE: This only works for templates beginning with “example-” or based off an example template)
Note the data type (e.g.
or [field] or [signature]) and the array position number (for fields, this will be the same as the field number; for html fields and signatures it will start at [0]), for each piece of data you want to show on the pdf. Write them down for use further on.
4) Modify or create a template for your PDF
NOTE: You are creating two different versions of your contract. The first one was on the form that gets filled out. The second is the PDF output of the form. They can be the same or different. That is up to you. For purposes of this example, we will assume you want them to look roughly the same.
Start with the file example-template.php as a base. Make a copy and give it a unique name. Leave it in the YOUR_WEBSITE_DIRECTORY/wp-contents/uploads/PDF_EXTENDED_TEMPLATES/ directory.Scroll down to approximately line 23. That is where the HTML starts. The example includes lots of hints for constructing the HTML template for your PDF. The other examples in that folder do as well.
Replace example HTML with your HTML. Anywhere you want to include dynamic data from the form, you will insert PHP code, like this, to pull the form data into your HTML:
<?php echo $form_data['field'][17]; ?>
This pulls from Field number 17. Or, to pull from the first HTML Block on the form:
<?php echo $form_data['html'][0]; ?>
Again, to see the fields available and their IDs, just add “&data=1” to the URL of any PDF you are viewing that is based on an example template (like the one you are creating.)
NOTE: There are two ways to construct the form. One is to recreate all of the HTML in the template and insert the field values as shown above.
Another, which may be easier when your form is fairly simple, is to pull in the HTML block from the form, rather than duplicating the html here.
5) Adjust your configuration.php to point to the correct template
Go back to your configuration.php file in YOUR_WEBSITE_DIRECTORY/wp-contents/uploads/PDF_EXTENDED_TEMPLATES/.
Modify the name of the template for each for you wish to turn into a PDF:
$gf_pdf_config[] = array(
'form_id' => 1,
'template' => 'my-new-contract-template.php',
'save' => true,
'notifications' => array('Admin Notification', 'User Notification')
);
SAVE and Close.
1) Download the PDF to Infusionsoft script. Unzip the file and place both of the unzipped files (infusionsoft-settings.php and pdf-to-infusionsoft.php) in a new folder called “pdf-to-infusionsoft”, inside the Plugins folder of your active theme (YOUR_WEBSITE_DIRECTORY/wp-contents/themes/YOUR_THEME/plugins/pdf-to-infusionsoft/…).
Log in to your WordPress site and go to Plugins. You should see the PDF to Infusionsoft plugin. Click the link to Activate the plugin.Now, go to Settings, in your WordPress admin, and you should see PDF to Infusionsoft appear in the list of settings. Choose it.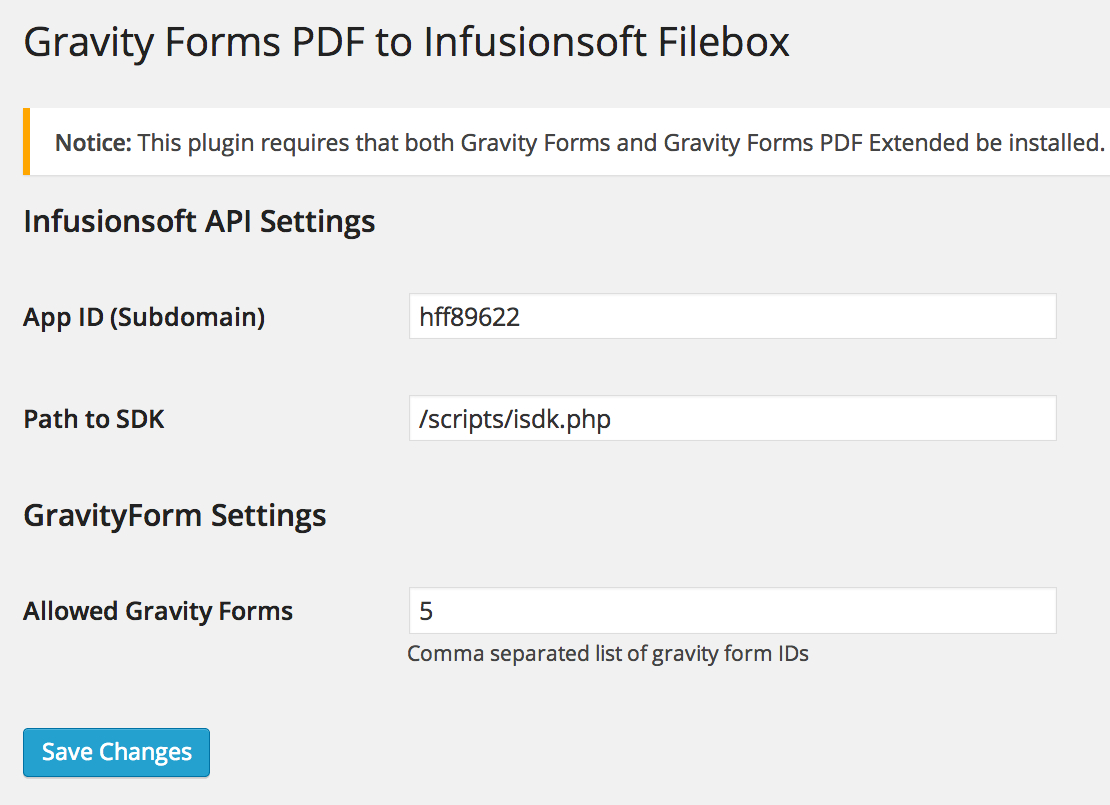
Add your app name and the path to the Infusionsoft SDK. This is the file(s) that connect to the Infusionsoft API. If you have not previously used the Infusionsoft API, you will have to set this up now, according to the instructions here.
Add the ID of any and all forms you want to send to Infusionsoft as PDFs.
1) Create a new automation link that includes all merge fields needed for the contract
Go to Marketing -> Settings -> Automation Links -> Automation Link -> Create Link
Give the link a name.
Construct a link like this:
http://theapiguys.com/contract-demo/?id=~Contact.Id~&company=~Contact.Company~&email=~Contact.Email~&first=~Contact.FirstName~&last=~Contact.LastName~ where the URL before the ? is the URL of the web site page where you added the Gravity Form contract in Step 2.5.
NOTE: Everything after the ? is known as a “query string” and it has a pattern of key=value separated by &’s. In this case, the key is the parameter name you put in the Gravity Form fields in Step 2.2. The key must match the parameter you chose in Step 2.2 for the data from Infusionsoft to pass to the Gravity Form contract. The value (the part after the =, is a standard Infusionsoft merge field.
Include as many key value pairs as necessary to pass all needed information from Infusionsoft to Gravity Forms
Change “What do you want the customer to see when they click this link?” to the link you just constructed.
Add Link Text as necessary and Save.
1) Send an email to yourself, from a contact record, containing your Contract Automation Link. Make sure your necessary merge fields have something in them.
2) Click the link from the email. It should:
3) Submit the form. It should:
If the email does not take you to the contract page on your website:
If the form doesn’t pass the data you included in the query string:
If the form doesn’t send notification emails:
If the notification email does not contain the PDF:
If the contact’s filebox does not contain the PDF:
Last week, we discussed creating a solid business laden with “best practices” that will yield superior results.
This week, we are going to show you a “must” best practice for your business, that will not only help you yield superior results, but also save you an immeasurable amount of time.
Drumroll please…
Label every single snippet, sequence and goal in your campaign, and include notes for what each campaign does.
Can you imagine the nightmare taking on a new client and opening up the Infusionsoft application only to discover there are no notes in the campaigns?
Emails are simply labeled Email #1, Email #2 and Email #3…
Goals are not defined…
Snippets are not labeled…
Oy vey…this occurs more often than you may think.
Notes and labels are imperative to your Infusionsoft success and – like we mentioned last week – if you don’t create them when you’re building the campaign, you won’t do it later.
Now, labeling can be tedious so be sure to factor in ample “labeling time” when building out your campaign. The more descriptive you can be the better, but there’s no need for you to write a book—just clear, concise labels and notes.
This will allow you to easily identify and copy sequences, campaigns and emails from one campaign to another. It will also help others better-see the picture you have painted on that beautiful Infusionsoft canvas.
When you incorporate label and note making into your business best-practice list, you make life easier for yourself and others.
You also guarantee yourself better results because you’ll end up spending less time figuring out “what’s going on?” and more time creating a well-documented, revenue generating campaign.
To get access to even more incredible Infusionsoft tips, we invite you to join us in our next Art of Campaign Building Foundations Course. During session one, we will get into the nitty-gritty of Campaign Building Practices.
The course is now available as an online course! To learn more about the Art of Campaign Building Foundations Course click here.