What It Does
Advanced Merge Field Notation is the way you tell Pocket Developer what field you want to work with.
You may want to get information from it, change the information in it or merge it into an email or HTTP POST snippet. But somehow, you have to tell Pocket Developer which specific field (e.g. phone) and in what specific table (e.g. contact, company or opportunity) you are referring to. That is what Advanced Merge Field Notation does.
Advanced Merge Field Notation has a similar syntax to Infusionsoft’s familiar merge field notation:
~TableName.FieldName~ or ~TableName._CustomFieldName~
We just add to that notation and throw in a bunch of cool twists to make it super powerful.
With Advanced Merge Field Notation, you can specify any record or records in the Infusionsoft database just like you were running a query. You are not just limited to the contact table or the merge fields given to you in the Merge Field button dropdown.
Using Advanced Merge Field Notation, you can now:
- access company, tasks, appointments, tags, opportunities, orders, invoices, invoices, products, payments, referrals, affiliates and any other Infusionsoft table accessible to the API
- update them, get information from them, merge them, count them, compare them, average them, find the min, the max, the newest, the oldest, the first updated, last updated, combine them, filter using wildcards and tags, and much more
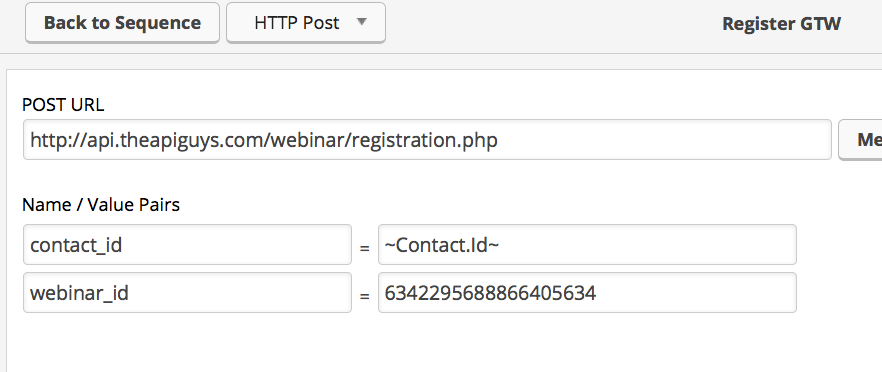
- display them in an email, use them to trigger an action (using Universal Delay Timer) or merge them into an HTTP POST for an external application (e.g. document signing)
- build complex datasets that require you to drill down into the tables (e.g. finding specific credit card charges)
- merge information from or update a contact other than the one going through the campaign (e.g. the record of the referrer or opportunity owner)
- merge date information such as the current date, month, day of week, year and more
We know … crazy, right? Yeah … crazy awesome!
Where I Can I Use It?
Advanced Merge Field Notation is available in all “Core” Pocket Developer plug-ins. Core plug-ins are the yellow ones in the Pocket Developer Store.
Core plug-ins include (at last count):
- Any Date, Any Format, Anywhere
- Any Opportunity To Any Stage
- Any Text Anywhere
- Contact’s Company
- Email Anyone Anytime
- Field Math
- Tags On The Fly
- Universal Delay Timer
Check the Pocket Developer Plug-In Store for the most updated list and to see all 30+ Pocket Developer plug-ins.
How To Use It
Query Notation
~TableName.FieldName.[FilterBy(...)][.OrderBy(...)][.Qualifier1[.QualifierN[...]]]~
Opportunity.Id.FilterBy(OpportunityTitle:"Steve %")Reference Notation
TableName(RecordID).FieldNameOpportunity(15).OpportunityTitleRequired Parameters
Table
- The name of the table being queried
Field
- The field whose value you’d like to get or set
Qualifiers
The table and field names can be further modified by “qualifiers.” Qualifiers can be either “filters” or “directives.”Filters will generally be used to pare down the results of an advanced merge field notation query, so as to more easily return or set one record in particular.Directives will generally be used to request an alternative result or take some action to further modify the resulting set of data.
- Qualifiers may be chained, as in (…).Newest.Unpaid
- The ‘Newest’ qualifier is assumed if no Newest/Oldest/Last/First is specified
- Qualifiers are optional
- Results will be ordered by DateCreated (if available) by default, unless explicitly overwritten with the OrderBy directive
List of Valid Qualifiers
- .FilterBy
- .Newest (or .Last)
- .Oldest (or .First)
- .Paid
- .Unpaid
- .IsEmpty
- .IsNotEmpty
- .GreaterThan
- .GreaterThanOrEqualTo
- .LessThan
- .LessThanOrEqualTo
- .Before
- .After
- .HasAnyTag
- .HasAllTags
Filters
- A list of key/value pairs with a field name as the key
- Values that contain commas, periods, and/or colons must be wrapped in quotation marks (e.g. “This is my name: Steve,” “Hi, how are you,” or “99.3.”)
- Integer values may be used without surrounding quotation marks
- Text values should always be surrounded with quotation marks
- Quotation marks and tilde characters should be escaped when used within the FilterBy directive (e.g. “He said “Hello” first” or “Use ~ toe merge”)
- A percentage character (%) can be used as a wildcard
Examples:
Return the description field of the newest appointment for that contact:
~ContactAction.ActionDescription.FilterBy(IsAppointment:1)~
Return the description field of the newest task or note for that contact where Action Type is “Call:”
~ContactAction.ActionDescription.FilterBy(ActionType:"Call")~
Return the description field of the newest appointment for that contact where “Consulting Call” is somewhere in the Description:
~ContactAction.ActionDescription.FilterBy(IsAppointment:1, ActionDescription:"%Consulting Call%")~
- Selects desired data from the newest record out of the query result
- Newest is the default behavior when more than one record is returned and Newest/Oldest/Last/First is not specified
- “Newest” is, by default, related to date of creation. Use “OrderBy” to specify alternate sorting.
Example:
Refer to the Id of the newest (most recent) order:
Order.Id.Newest
- Selects desired data from the oldest record out of the query result
- “Oldest” is, by default, related to date of creation. Use “OrderBy” to specify alternate sorting.
Example:
Refer to the Id of the oldest (first) invoice:
Invoice.Id.Oldest
Paid (only supported for queries on Invoice table)
- Reduce or filter the query results to those invoices which are currently marked “PAID”
Example:
Refer to the Id of the newest (most recent) paid invoice:
Invoice.Id.Paid
Unpaid (only supported for queries on Invoice table)
- Reduce or filter the query results to those invoices which are currently marked “UNPAID”
Example:
Invoice.Id.Unpaid- Only returns fields that have no value
- Generally used when you want to update a field only when it is empty, although it does have other uses
Example:
Order.OrderTitle.IsEmpty- Only returns fields that have a value. Empty fields are ignored.
Example:
Order.OrderTitle.IsNotEmpty- Keep only those query results which have a numeric value greater than the value specified in the filter parameters.
Example:
Order.Id.GreaterThan(300)- Keep only those query results which have a numeric value greater than or equal to the value specified in the filter parameters.
Example:
Order.Id.GreaterThanOrEqualTo(300)- Keep only those query results which have a numeric value less than the value specified in the filter parameters.
Example:
Order.Id.LessThan(300)- Keep only those query results which have a numeric value less than or equal to the value specified in the filter parameters.
Example:
Order.Id.LessThanOrEqualTo(300)- Keep only those query results that have a date before the value specified in the filter parameters. Date equivalent of LessThan.
Example:
Order.DueDate.Before("12/31/2014")- Keep only those query results that have a date afterthe value specified in the filter parameters. Date equivalent of GreaterThan.
Example:
Order.DueDate.After("12/31/2013")Directives
- Allows you to sort the results of a query by the specified field
- OrderBy sorts all resulting matches in ascending order (lowest to highest, oldest to newest)
- Fields specified in the OrderBy directive are assumed to be date fields
- To sort a number or text, the notation should be append “:Text” or “:Number” to the field name
- The field name can be any field within the table
Examples:
~Opportunity.OpportunityTitle.OrderBy(EstimatedCloseDate)~~Opportunity.OpportunityTitle.FilterBy(StageID:56).OrderBy(_LastStageMove)~Return the title of the first opportunity where the Opportunity Stage is 56 (e.g. Awaiting Contract) when sorted alphabetically by Leadsource~Opportunity.OpportunityTitle.FilterBy(StageID:56).OrderBy(Leadsource:Text)~Return the title of the first opportunity where the Opportunity Stage is 56 (e.g. Awaiting Contract) when sorted numerically (lowest to highest) by Stage ID~Opportunity.OpportunityTitle.FilterBy(StageID:56).OrderBy(StageID:Number)~- Returns the maximum of all returned numeric values in the specified field
Example:
Order.Id.Max- Returns the minimum of all returned numeric values in the specified field
Example:
Order.Id.Min- Returns the number of results yielded from an Advanced Merge Field query
Example:
Opportunity.Id.Count- Returns the sum total of all values returned by the Advanced Merge Field query
Example:
OrderItem.Qty.FilterBy(OrderId:15).Sum- Runs “global” queries for all contacts, not just the contact associated with the action or sequence that invoked the call to the plug-in.
Example:
Contact.Id.Global.FilterBy(PostalCode:"902%").Count- Combines all the results of a given Advanced Merge Field query into one string, and applies a “glue” in between each result set value.
Example:
Order.Id.GreaterThan(300).Combine(", ")- Similar to Combine except it takes no “glue” parameter
- Used to get or update all records that meet the query criteria
- Common use case would be to set all fields that meet query criteria to blank
- If “All” is used on a get or retrieval request, the resulting set will be a space delimited string of all result data.
Example:
Opportunity._MyField.AllDate (pseudo-table)
The following Advanced Merge Fields will be replaced when supplied to Pocket Developer:
- Date.Current (Month D, YYYY)
- Date.DayOfWeek (Day)
- Date.DayOfMonth (D)
- Date.Month (Month)
- Date.MonthOfYear (M)
- Date.Year (YYYY)
- Date.Timestamp (YYYYMMDD H:M:S TZ)
Demo Video
More Examples
Opportunity.ContactID.FilterBy(StageID:59)
Opportunity._CourseName.FilterBy(OpportunityTitle:”Send Client a “Project” Proposal”, AffiliateId:15)
Invoice.InvoiceTotal.FilterBy(PayStatus:1, RefundStatus:0).Oldest
Contact._Number.GreaterThan(0).LessThan(5)
Pro Tips
You can use prefetch to burrow deep down into the tables for a specific piece of information.
Frequently Asked Questions
Q. Where do I find all of the table and field names?
A. Infusionsoft has a complete reference for all the tables and fields you can use with Pocket Developer’s Advanced Merge Field Notation. Although the table names, in particular, may not be immediately obvious, the descriptions will help you find what information is stored in each table.
To get full use from Pocket Developer, familiarizing yourself with all the information available is very helpful.
