Installing the Plug-In
If, for any reason, you have not installed your Pocket Developer plug-in, follow these simple instructions, to learn how.
Configuring the HTTP Post Snippet
1. In the campaign sequence, add an HTTP Post snippet at the end of a sequence, where you want the delay to occur.
2. Open the HTTP Post snippet and configure as follows:
- URL: http://yoursite.com/scripts/PocketDeveloper/Blocks/CustomDelay/customdelay.php
- contactId => ~contact.Id~ (do not change)
- callName => add a name that is unique to this Delay Snippet e.g., PDWakeUp23521
- delayFor => number of seconds you want to delay
NOTES: Remember, Name/Value pairs are case-sensitive. If you put the same callName in multiple places, even in multiple campaigns, you could get unintended consequences!
3. Copy the name you created for callName and close the HTTP Post snippet. Custom Delay Timer POST snippets should always be the last thing in that sequence
Configuring the API Goal
4. Drag out any Goal from the Toolbox. Give it a name, like Wake Up or Resume Sequence.
5. Double click the meta icon in the lower left corner of the goal. Change the Goal type to API Call Made (last one in the drop-down)
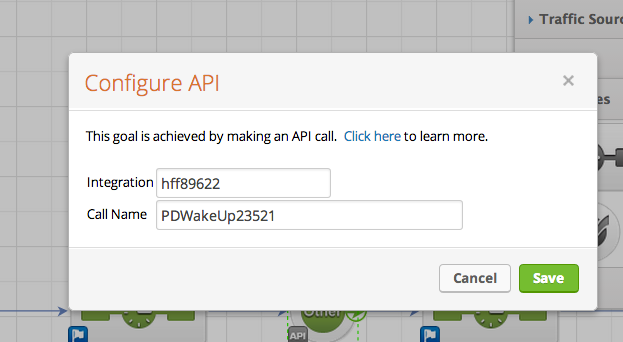
6. Configure the Goal as follows:
- Integration => your Infusionsoft app name
- Call Name => name you used and copied from the HTTP POST Snippet, e.g. PDWakeUp23521
7. Connect the Sequence containing the Delay Snippet (the one with the HTTP POST calling /customdelay.php) to the API Goal you just created.
8. Then connect the API Goal to a sequence containing whatever you want to happen after the delay. Continue your Campaign as normal.
Demo Video


